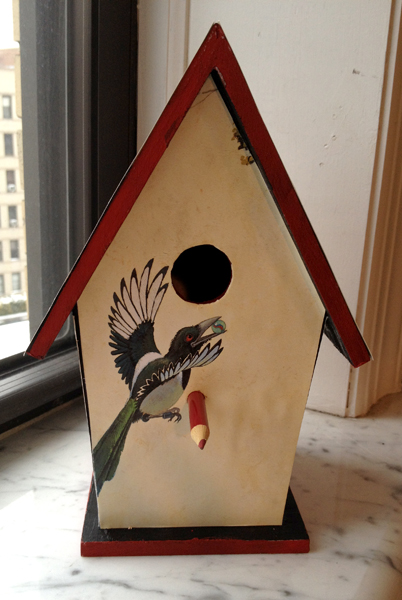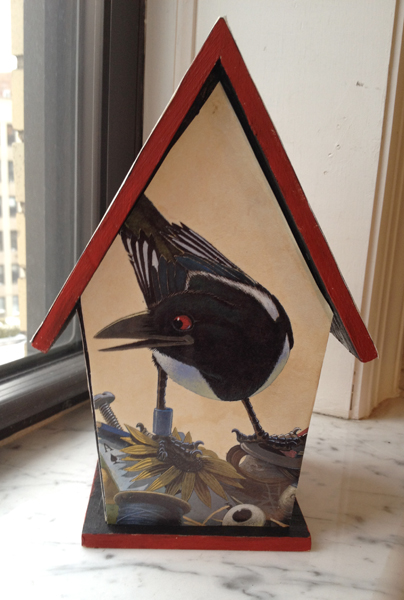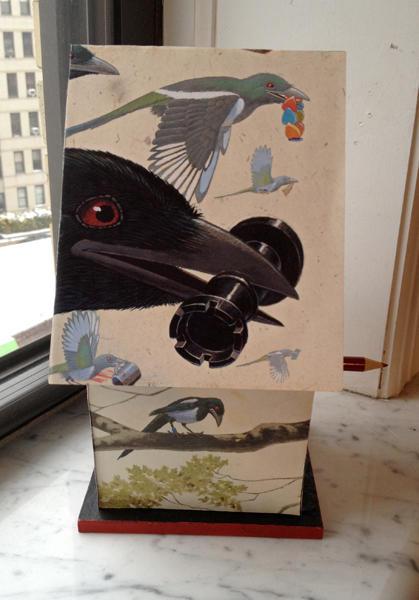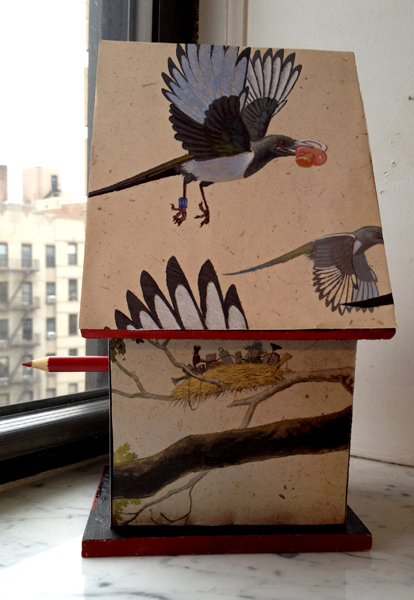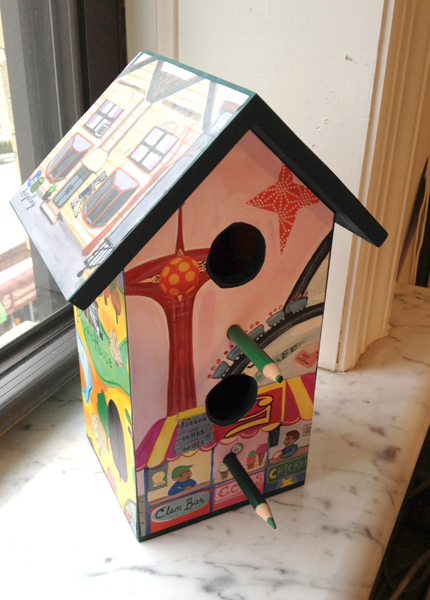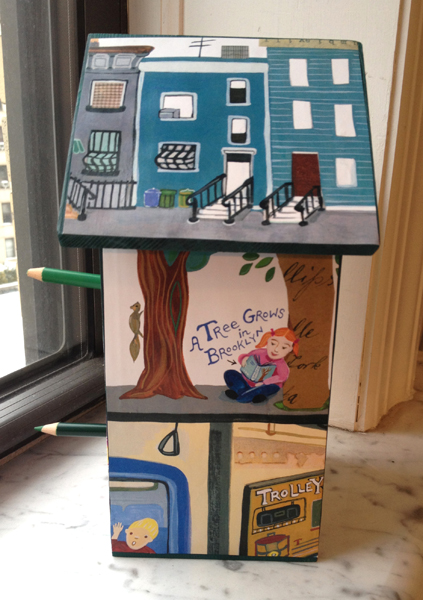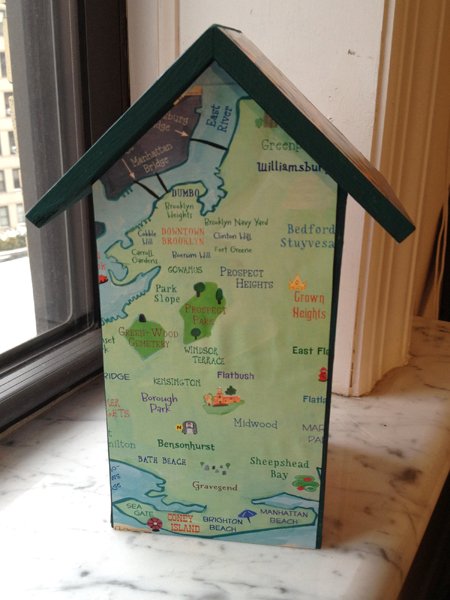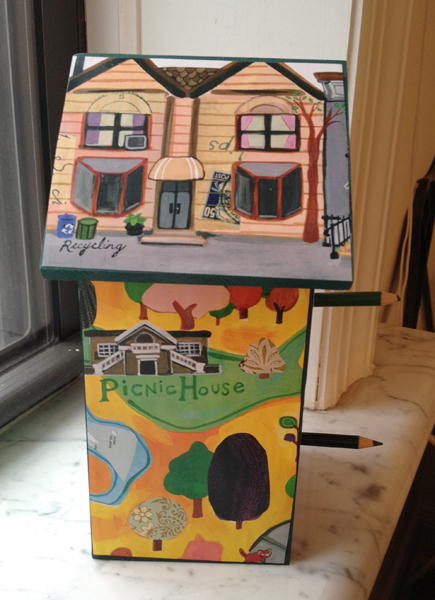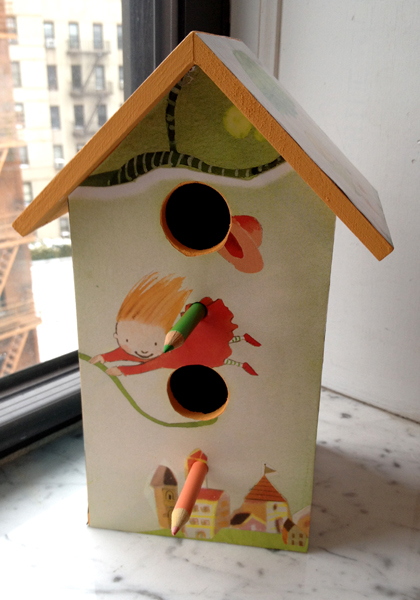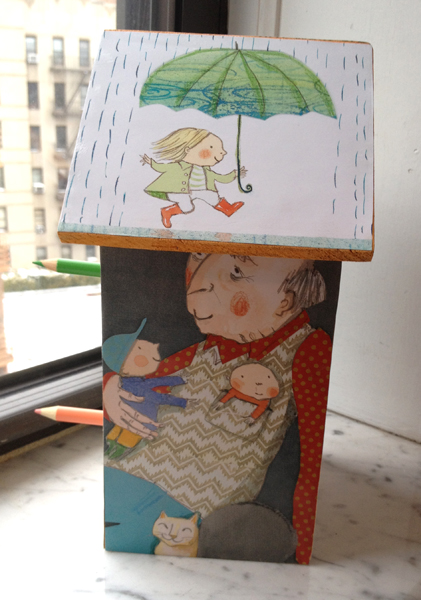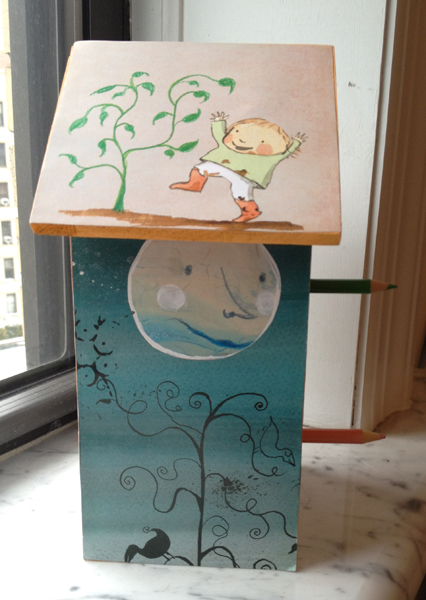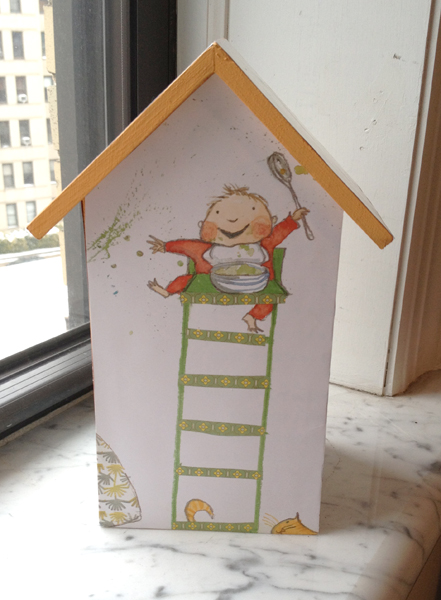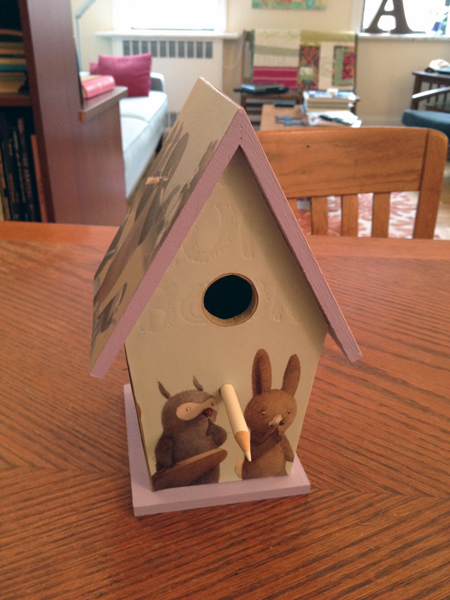
A Bookish Birdhouse from The Quiet Book.
Back before moving to New York and packing away my birdhouse-making supplies, I promised to share with you my instructions for making what I call “
Bookish Birdhouses.” It’s taken a long time, but I’m finally living up to that promise! Earlier this year I unpacked my supplies and hosted a Bookish Birdhouse workshop in our apartment for three friends and colleagues, who agreed to let me photograph them as they tried their hands at this project for the first time. Included with this post are photos (click to view larger) of their efforts and mine — hopefully enough to tempt you to try this project too! I’ve made about 20 Bookish Birdhouses as gifts in past 3 years, and each one has turned out beautifully. If you can cut and paste paper, this is a craft you can do!
The birdhouse on the right featuring art from
The Quiet Book, written by Deborah Underwood and illustrated by Renata Liwska, was a retirement gift for the amazing and wonderful
Beth Puffer, lately of
Bank Street Bookstore. The other birdhouses and birdhouse-makers featured below are as follows… Betsy Bird (of the New York Public Library and
Fuse8) made a birdhouse featuring
More written by I. C. Springman and beautifully illustrated by Brian Lies; Heather Scott (my Scholastic Book Clubs colleague and
Aunt Feather) made a birdhouse featuring
B Is for Brooklyn by Selina Alko; and Lori Ess (who shares an office with me!) made a birdhouse that features Polly Dunbar’s fantastic illustrations for
Here’s a Little Poem edited by Jane Yolen and Andrew Fusek Peters. (The
Miss Rumphius birdhouse was another of my own projects.)
Three quick things before we dive in:
First, these birdhouses are intended for decorative purposes only. You can try putting one outside for use by actual birds, but I suspect it won’t last long if you do!
Second, unless you are using books that are no longer under copyright, you are arguably in violation of
copyright law by making one of these beauties. (See info about “
derivative works” for more info.) It’s a gray area of the law, but suffice it to say that you could well into hot water for making these and trying to sell them. GIFTS! They make great GIFTS!
Third, you should NOT be intimidated by the length of these instructions! It’s
not hard to make one of these beauties (
even a 6th grader can do it), but some steps are trickier than others, and I hope to save you from potential frustration by giving you my insider tips.
BOOKISH BIRDHOUSE SUPPLIES:
* Pre-assembled, unfinished wood birdhouse (see specific suggestions below supply list)
* Sandpaper (fine grain is probably best)
* Cheap acrylic paint (also called “craft paint”) — usually about $1 for each small bottle, available in every color imaginable
* Paintbrushes — various sizes for painting, one good sturdy one for pasting
* Scissors
* Yes Paste (or Mod Podge or PVA if you prefer) — you can purchase it from any craft store
* Colored pencils to use as perches
* A book you don’t mind disassembling, or an F & G (“folded and gathered” picture book proof)
Other things you might need/want:
* Pliers (for removing perches) — see Step 2
* Sealant (if you want to protect your finished birdhouse) — see Step 7 for my recommendations
* a Dowel Rod (if you don’t want to use pencils as perches) — see Step 8
ABOUT BUYING BIRDHOUSES: I buy cheap (about $5) birdhouses from craft supply stores like Michael’s or A.C. Moore. The ones I buy are approx. 9 inches tall and 4 inches deep/wide. (I have not been able to find these sizes and shapes available anywhere online.) I generally like ones that are made from lightweight, cheap “wood” material. Some stores carry two kinds of birdhouses — those made from really lightweight cheap stuff and houses made from sturdier pine. The pine birdhouses are about $2 more expensive, and I personally find them harder to work with. If you have both options, my advice would be to go the cheaper route, at least for your first attempt!
When choosing a birdhouse, don’t worry about discolored wood as you’ll be covering that up. DO, though, look for one that has relatively few dings and seams with few gaps. You’ll cover up most flaws, but it’s easier to work around them when there are few. Try gently wiggling the perch (or perches) in the house — if a perch feels loose, that’s going to make your life easier, as you’ll see in step two below.
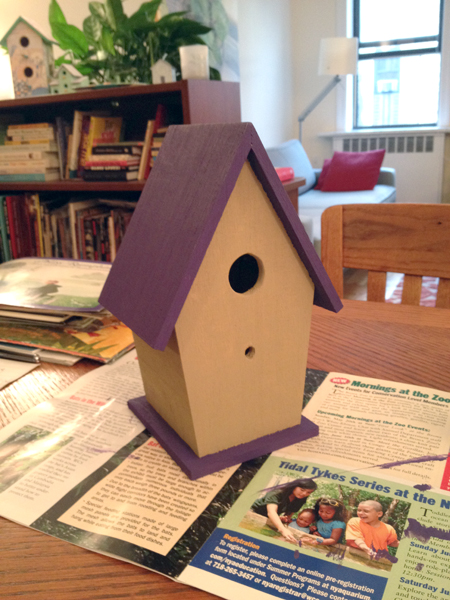
A Single-Story Birdhouse, Newly Painted, with Perch Removed
If you’re debating between what I call a “one-story” birdhouse (one perch, one entrance/exit hole) and a “two-story” birdhouse, look at the pages of the book you’ll be working with. If most of your favorite artwork in the book has a vertical composition (meaning much of what you want to show is tall or long rather than short or wide), then a two-story house is probably going to work best for you. If the art on the page tends to be more horizontal, you’ll probably want to go the single-story route. If you’re not really sure what will work best, bring your book with you to the craft store and hold up your favorite pages to the sides and/or roof of each kind of birdhouse to see what things you’ll be cutting off in order to make a page fit — that’ll help decide things for you.
One more thing: on one occasion I bought a couple of birdhouses that had larger than normal perches, which is to say larger-than-the-circumference-of-a-pencil perches. What I thought would be a fun opportunity to try something creative turned out to be a royal pain. If you buy one of these birdhouses you’ll either have to keep that original perch intact when you remove it so that you can use it again OR you’ll have to find a dowel/other object that will work in its place. You *can* wrap wax paper around a pencil until it “becomes” the right width or just use a lot of hot glue to get it to stay in place, but my advice? You’re better off just avoiding birdhouses with big perches.
BOOKISH BIRDHOUSE INSTRUCTIONS:
Step 1: SANDING
Sand down any really rough patches on your birdhouse. You’ll often find these along the top ridge of the roof and inside the holes through which birds would (if they were actually using it) enter the house. If there are gaps along the birdhouse’s seams you can fill them with wood putty, but I generally just leave them alone. Most will either be covered with paper or they’ll become virtually unnoticeable once you’ve painted and decoupaged the whole thing.
Step 2: Let’s call it… DEPERCHING
Remove the perch (or perches) from the front of the birdhouse. I usually try, first, to do this by just wiggling the perch from side to side to loosen the glue holding it in place. If you do this long enough it will usually get to a point where you can then just pull it out. This is especially handy if you’d rather not use a pencil for a perch, as you can paint that intact perch and re-insert it later. If you’ve got a stubborn perch, though, you’ll have to use a pair of pliers to wrench the thing out of the birdhouse. In the process it may very well be crushed, but that’s okay. Just dig out the remaining perch using whatever tools seem to work best for you. (Linoleum cutting tools work well, but I’ve also been known to just poke at the stubborn bits with needle nose pliers until they came loose and fell into the birdhouse, after which I’ve shaken them out over a trash can.) If the front surface of your birdhouse looks a little worse for wear after your perch extractions, just sand it down a bit.
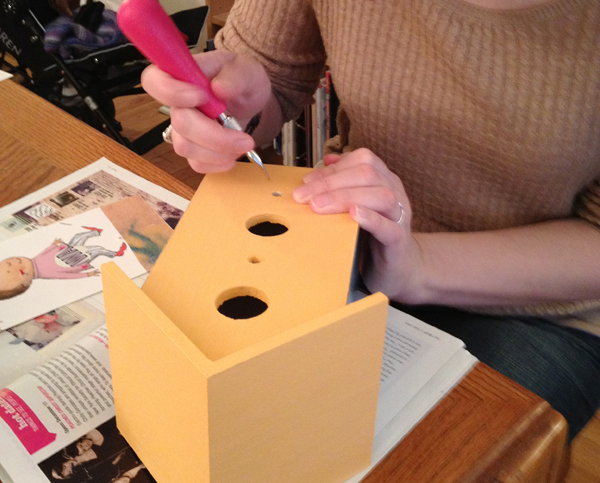
Lori gouges out perch remnants with a linoleum cutter.
Paint your birdhouse. I typically use 2 colors on mine — a neutral color for the “body” of the birdhouse, a brighter color for the roof and (if it has one) base — and I usually apply two coats of paint. (If you’re using inexpensive craft paints, you’ll find they dry very fast, so this part isn’t very time-consuming.) I try to choose colors that will coordinate nicely with whatever book I plan on working with. If you cut the pieces for your birdhouse carefully you will see almost none of the paint on the birdhouse except for that along the roof edges and around the entrance/exit hole(s), so you could technically just paint those spots. My preference, though, is to paint the whole thing. That way people will see a nice bit of complementary color anywhere that your cutting has gone awry, and it’ll have a more polished look.
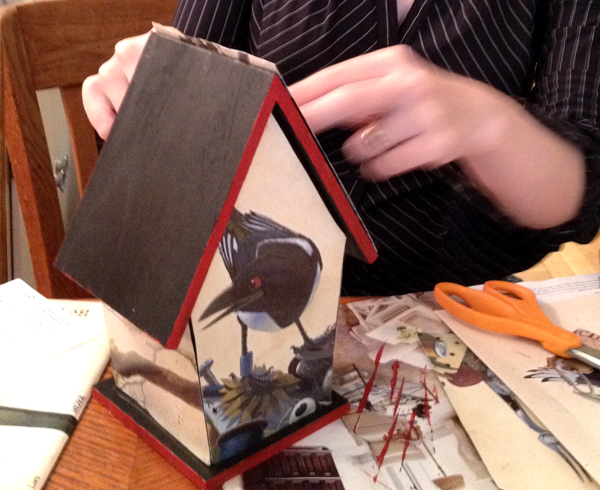
Betsy glues pages from More to her black and red birdhouse.
Step 4: COMPOSING
This is probably the most important part of the whole process. Take apart the book (or F&G) you’ll be working with and hold up the pages you most want to feature on the birdhouse, to see which will look best on which sides of the house. Think about the overall look you want the birdhouse to have, or the images that you find the most interesting. Pay special attention to the FRONT of the birdhouse, as it poses a unique challenge. Whatever page you position here will have one or (if you chose a two-story house) two large holes cut through the front of it and two perches protruding through it as well. When you lay a page over the front of the house, note where those holes and perches are going to be, and make sure they don’t wind up, say, cutting a character’s head off or in the case of the perches, um… making your birdhouse look obscene. Ahem.
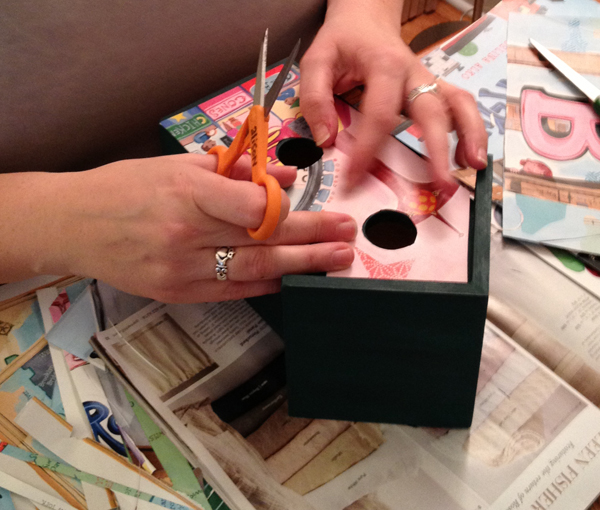
Heather settled on this image from B Is for Brooklyn for the front of her birdhouse.
Step 5: FOLDING AND CUTTING
On each flat side of the birdhouse (body and roof), center the page you’d like to use over the place where you want it, then fold the corners of that page around the edges of that surface. Crease those folds well. Then take your scissors and cut along those fold lines. You *should* now have a piece that’s an almost perfect fit for the space where you wanted it. I often find, though, that I have to go back and do a teeny bit of trimming to make sure things will cleanly abut the edges of that space without leaving any overhang. If you wind up trimming too much, DO NOT WORRY! You can always cut the piece on the opposite side in the same way so that it looks intentional, or (better still) just decide not to worry about. When the birdhouse is done, the art is what’s going to stand out — not your cutting! Trust me when I say that no one will notice if you didn’t cut things in a straight line. I rarely do!
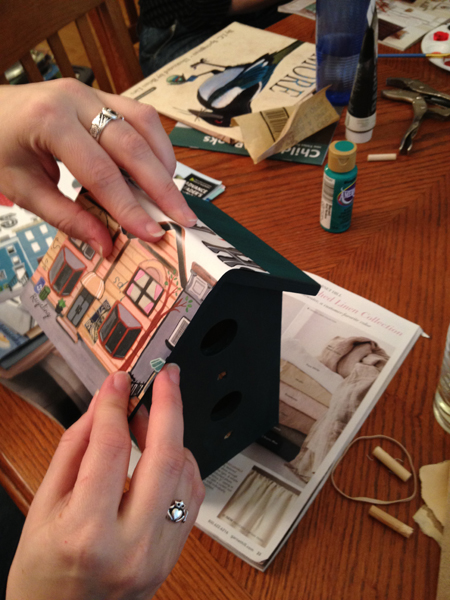
Heather folds page over the top of the roof to make a crease/cutting line. Betsy figures how how to arrange page on rooftop then folds and creases it over the top and the side to create a cutting line.
The challenge of this step is (you guessed it) cutting the piece that goes on the front of your birdhouse. To do that section, I always lay the piece of paper over the birdhouse so that the art is laying over the spot where I eventually want it to be. Then I take the top right-hand corner of that page and fold it in so that it follows the right-hand angle on the top of the roof. Once you’ve folded that corner, make sure that newly folded angle is flush against that part of the roof and then fold in the top left-hand corner of your page in the same way. You should now have a piece of paper that looks like a fat arrow, with point at the top and a wide bottom. Now fold the sides of that piece of paper around the sides of the birdhouse, and do the same with the bottom. As above, crease everything well, remove it from the birdhouse, unfold your paper, and use the creases in the paper as your cutting guidelines. Trim things to fit as need be. (See notes about perfection not mattering here!)
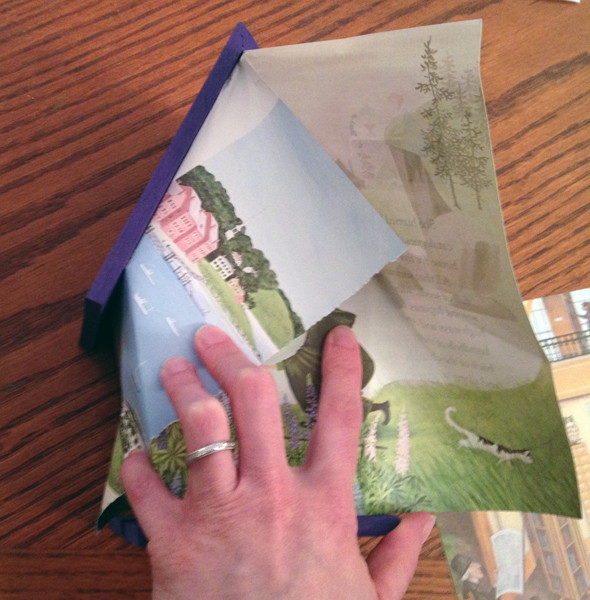
Folding rectangular page to fit under triangular roof.
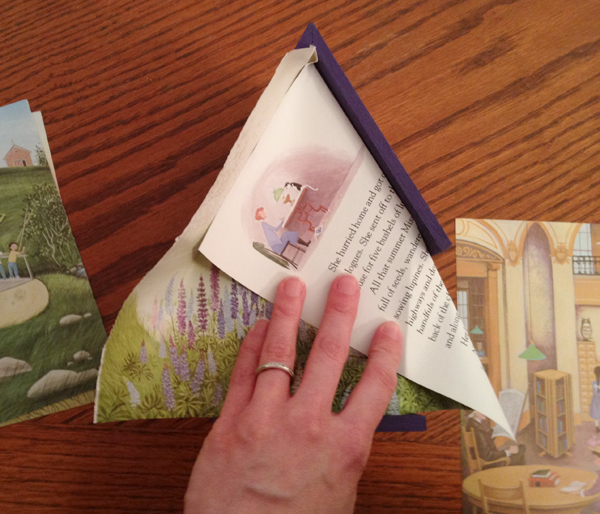
Folding and creasing art for front of birdhouse.
There’s one more tricky bit to be done before you start pasting down your pieces, and that’s putting holes through the paper that’ll go on the front of your birdhouse. Getting these circles to look perfect is a bit of a challenge by almost any method, but AGAIN defer to my “trim things a bit here and there, don’t worry about being exact” instructions. If you wind up cutting your circles TOO big, it won’t matter — it’ll look intentional. Worry more about getting your circles to look round than about how much of your paint job is showing through. Again I say, NO ONE will notice!
After you’ve got a piece cut for the front of your birdhouse, lay it back on the birdhouse again. Now take your finger and run it over the paper, tracing a path around and around the entrance/exit hole in the birdhouse. Do it hard enough to make the paper pucker a bit over the edge of that hole — the idea is that you want to make a faint crease around the entire hole so that (again) you’ll know where to cut. If you look at the photo below (enlarge it!) you’ll see some discoloration where Lori ran her finger around the entrance and exit. Next, hold that piece of paper in place over the holes, take a pencil, and drive it through the page at the center of the entrance/exit hole. (Don’t be scared!) Now run your fingers over the paper, feeling for the perch hole(s). When you’re sure you’ve located it/them, drive your pencil through the paper, so that it tears through and forces a few scraggly edges of paper into the hole meant for your perch.
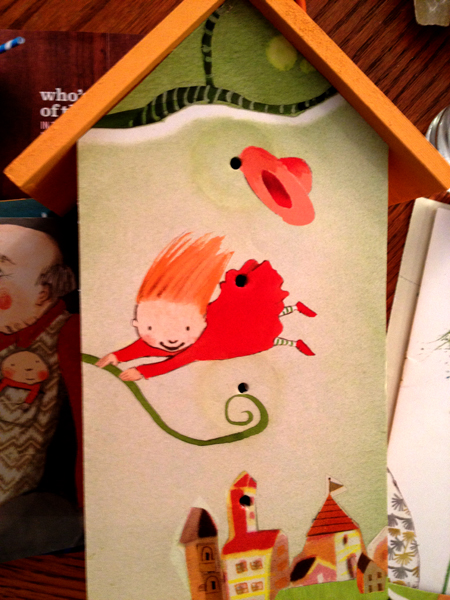
There are four holes in this piece of paper (which is just laying atop the birdhouse - not glued down!) The first and third holes were punched through the entrance and exit. The second and fourth holes will be for the pencil perches.
When you flip the paper over, you should have jagged, torn edges around your perch hole. Just trim those off and you’re done with that bit. If you angle your paper a bit in good light, you should be able to see a line where the edge of your entrance/exit hole would be, and there should be (thanks to your pencil) a hole in the middle of that space through which you can stick your scissors to begin the actual cutting. I usually cut several straight lines that radiate away from the center of my punched hole out to the edge of my circle. When I’m done with that, I cut on the crease line that’s visible between those radial slices. That way I’m only cutting one short curve at a time, which I find easier than holding my hand in an awkward position and attempting to cut a perfect circle in just one go.
STEP 7: PASTING
After you’ve got all your pieces cut, you are ready to begin pasting them onto your painted birdhouse. (Just make sure the paint is dry first!) I personally like to cut out ALL of my pieces before I start gluing them to my birdhouse. That way I can lay them on top or lightly tape them to the sides and see if I’m happy with my overall composition before I actually attach them to the birdhouse.

Pieces cut and ready to be added to Beth Puffer's birdhouse.
My favorite adhesive to use for this project is Yes Paste because it spreads well once you’ve used it for a bit, it’s not runny so it doesn’t oversaturate your paper, it remains repositionable for a few vital seconds after you first put your paper in place, and it lays nice and flat on the birdhouse with a lot less puckering than I’ve had when I used other glues. Alas I’ve found no guaranteed cure for puckering, but with Yes Paste I’ve had considerably less than I have with any other glue or paste that I’ve tried.
Lay the piece you’re working with face-down on a piece of scrap paper (I like to use discarded magazines or catalogs for this — when one spread gets gluey I just turn a few pages and voila! a new surface to work with). With a sturdy paintbrush, spread paste on your paper working from the center out, making sure to cover the entire surface of the page. You don’t have to use a lot of paste — the idea is not to glop it on, or you’ll have to wipe all your edges afterward. Just put a thin, clean layer on the entire piece, and try to work moderately fast so that the paste doesn’t dry too much in the process.
After you’ve got the back of your piece fully covered, lay it on the side of your birdhouse where you’d like it to be. If you’re off the first time and you act fast, you can peel it off and then lay it on again, or just push it with your fingers so that it’ll slide into the right position. Once it’s where you want it, smooth it all down so that there aren’t any bubbles anywhere. Wipe any extra paste off the edges. If your paper winds up hanging over an edge, use your scissors or an Exacto knife to trim it so that it’s flush.
Do the same thing with the other sides of your birdhouse until all the sides are covered.
STEP 8: SEALING
At this point, you are almost done with your birdhouse! HOORAY! Stand back and admire your work. If you want to add a protective finish to your birdhouse, to protect it against dust, moisture, or fading, this is when/where you’d want to do that. I personally have put a finish on just some of mine, but not all of them, because 1.) I have not yet found a finish that I love, and 2.) the picture book pages I’ve been working with have usually been coated in such a way that they’re a bit more resilient than, say, your basic uncoated office paper or something that’s been dyed. If you are going to use your birdhouse in a very sunny spot, though, I would find some way to protect it. And keep them away from moisture!! No matter how flat they are when you glue them down, those pages you’re working with can buckle later, and there’s no way (that I know of) to remove the air bubbles underneath them once they do.
If you’re fine with leaving your birdhouse as is, skip to Step 9. If not, read on!
Here are my thoughts regarding the various sealants that I’ve tried on birdhouses or other such projects: Mod Podge is a popular choice for sealing projects like this, but I don’t like that it can sometimes become tacky (especially if you live in a humid climate), and that it sometimes shows brush strokes, so it’s not my weapon of choice. Acrylic Medium is another option, but the same possible pitfalls apply, in my experience. Of those I’ve tried, I think Aleene’s Acrylic Spray Finish worked the best, but it’s REALLY important not to over-spray your piece (don’t get too close, and keep your spray can moving) or you’ll wind up with spots where the finish has drips or looks cloudy. I recently used Krylon’s Preserve It! spray on a couple of birdhouses, but I can’t tell you whether or not it did much. One of these days I’m going to try a spray-on polyurethane, but I haven’t been brave enough to try it yet. If you’re braver than I am, just make sure that you buy stuff that’s “non-yellowing”! In all cases you have the option of choosing a finish that’s matte or glossy (and in some cases satin). I am personally a matte or satin finish fan, but glossy is just fine too!
STEP 9: PERCHING
Your last and final step is to add perches to your birdhouse. If you like the look of pencils as perches (that’s what I’ve used on all of mine), then pick out two colored pencils (or regular No. 2 lead pencils in the classic school bus yellow!) and stick them in your perch hole(s) so that the pencils hit the back wall inside the birdhouse. See how far they stick out? If you’re using a brand new pencil, they probably stick out so far as to look silly. Estimate how much you’ll want to remove from the pencil, pull it out of the birdhouse, and then pick up your scissors. Put the pencil between the blades of your scissors so that the blades hit right at the point where you want your pencil to break. Now squeeze your scissors together to put a tiny dent in your pencil. Turn the pencil a bit and do it again. Turn and cut. Turn and cut. Do this until you’ve got deep grooves the whole way around the spot where you want the pencil to break. Now put your scissors down and break the pencil. It should come apart right at the spot where you scored it! Stick it back into our birdhouse so that it hits the back wall. It should stay in place quite well this way, but if for some reason it doesn’t, put some glue around the inside of the perch hole and then slide your pencil into place. Once the glue sets the pencil should stay where you want it.
If you don’t like the pencil look and you were able to preserve your original perch, paint that and put it back in its place. If you want a traditional perch but your original one bit the dust, find a dowel rod that’s the right circumference, cut a section that’s the proper length, paint it, put it in place, and you’re good to go!
Step 10: CELEBRATING
You’re finished! You did it! Doesn’t your birdhouse look wonderful? Don’t you love it to pieces? Great. Now go make another one! (I promise it’s easier the second time.) Let me know how it goes after you try your hand at one! And feel free to post questions in the comments – I’ll answer as best I can!
Here’s how the birdhouses by the first-timers turned out. (BEAUTIFUL!!)
