Monthly Archives: May 2012

Bookstore Diplomacy


Josie Leavitt - May 16, 2012

We are blessed with a rich and vibrant core of local authors in our town. Some have been published by the big publishers, others have been self-published, and some have been published by very small local publishers. When a customer comes to us with his or her book we do our best to herald the occasion.
I’m discovering that my idea of heralding and an author’s can be two different things. Recently, an author came in and wondered why we still only had one copy of her book and not a stack of them. I explained that we can’t afford to have stacks of anything on hand. She was not satisfied with that answer and suggested that I have at least 20 on hand at all times. I did not laugh at that suggestion. I realize that many books are the culmination of lifelong dreams. We had stacks of it last summer when it was new, but that point held little sway. She wanted to know where to send people for her book. I said we’d be getting five more in. “Well, that’s not enough.” But it is.
Trying to explain how the distribution cycle works for my business is not fascinating stuff, even to folks who own bookstores, so the author really didn’t care to hear my explanation of shipping times and cash flow. All she saw was one lone copy of her book and saw it as a lack of support. But it’s not.
There are only so many books I can carry. I have reordered five copies of her books, which will be in by the end of the week. She also suggested that I move her book from being spine out in the Vermont section to a face-out stack in our staff picks section. I told her that it was face-out in that section for the entire summer last year. But again, she was not happy.
I tried politely to explain that books cycle in and out of shelf spaces. New books often start out in the New and Notable case and then move around depending on many factors, including how well the book sold initially, customer interest, and other considerations. I tried to explain that a bookstore is a lot like a supermarket’s produce section, in that everything has to look fresh, and that means new books often get the lion’s share of face-out space.
But what this author failed to understand is that while a book may not be faced out, we still know it’s there and will still recommend it to customers. If we love a book, we’ll always recommend it, no matter where it is. I know everyone wants their book to be in a stack at the register, but that just can’t happen for all books, all the time.
So, now now I’m struggling with how to balance placating the author, who is a good customer, with our need to shelve books as we see fit. She left somewhat angry and I upped my order of her books to 10.
 

A Visit from Tracey Campbell Pearson


Josie Leavitt - May 14, 2012

Our Souped-Up Story Hour last week was with Tracey Campbell Pearson. She read from her latest book, Guinea Pigs Add Up. For this gathering we pulled out all the stops. Not only did we have Tracey, a Vermont delight, but we actually had a real, live guinea pig.
One of the great things about our staff is what they bring to the store from outside work. We have a bookseller who has a young son in a room with a classroom guinea pig. Kelly brought in Oreo before the event to get her acclimated to the bookstore.

Kelly with Oreo


We’ve never had a guinea pig before and boy, was it fun. Forty kids came in from the local school and they settled on the floor, neatly arranging themselves on their own coats. I’m always amazed at how many kids can fit in the store. They just pack down so much smaller than adults.
Tracey was great with kids, who all had to share what kind of animals they had at home. The kids were all very eager to find out what was in the cage, but Oreo stayed in her little house until it was time to make her big debut. Tracey drew a wonderful guinea pig with wings, who had special patterns on her skirt. Tracey spoke about how much she loved to draw patterns in her art. The kids all chimed in with their favorite patterns: dots, stars, etc. It was great fun to watch Tracey create this flying guinea pig out of nothing but lines of a colored pencil.
Tracey read the book and then Oreo made her debut. Kelly put a towel in her arms (Oreo’s preferred pad) and brought Oreo over for each child to see and pat. They were all very well behaved and Oreo was a champ. Tracey, a real pro at school events, had a four-foot guinea pig cut-out that kids could have their pictures as the face of a guinea pig. There were squeals of delight when the teachers took their pictures as the guinea pig.
Tracey is an author/illustrator who so clearly loves her work that it’s contagious. When she talks about creating stories and creating pictures, the kids, and adults, were leaning forward, listening intently and watching her draw. Tracey’s ease with events makes kids relax right away. Her organization for events is outstanding. She comes armed with dummies for the kids to look at, fun projects for them to take home include some really great coloring sheets, and her sense of fun.
Tracey is another shining example of the richness of Vermont’s children’s authors. The children left, clutching their coloring sheets and holding their walking partners, burbling about meeting an author and seeing her draw. All in all, it was a great way to spend a story hour.  Continue reading

Tips for Giving


Josie Leavitt - May 11, 2012

Every small business owner gets asked for charitable contributions practically every day. I’m finding that this spring seems to be an especially busy for events. While I like to give everyone, there are sometimes I need to say no. But here are some tips for getting to yes.
– The best way for me to give your organization a donation is to be shopper at my store. I’m always willing to help my customers with their causes.
– Understand that I’m more inclined to give to a literacy related organization than to others. If your child’s class is seeking something, be very clear about what the donation will be going towards. There was a school that called and asked if we donate and I asked what the cause was: funding a junior class trip to Barbados. Well, now, that’s not quite I had in mind for my gift certificate donation. Donation for books or enrollment scholarships, sure. Barbardos, not so much.
– We want to give to everyone. So, if we offer a gift card for less than you were thinking, please don’t say, “Is that the best you can do?” Someone actually said that us as they lamented that our $25 gift card wasn’t a $100.
– If we always give to your group, maybe skip a year of asking before seeking another donation. Skipping a year allows us to give t9 another group. Just the other day a customer decided to skip us in a funny way. Janet had come in seeking our annual donation to the Rotary. I happened to be out and she got to talking to a staffer and realized that we’d given a donation for the last six years and she thought we should take a break, so she bought the gift card herself to donate to the Rotary. And, she bought a book. That was just lovely. So next year, we’ll be sure to remember this.
– Be understanding if your organization is too far away from us for our gift card to actually be used. Part of giving a charitable donation is to bring new people to the store.
– We like talking to kids if their class is raising money. It’s always fun to hear from a third grader about how the money raised will be used for a trip to the Eco Center, so if they can come to talk us themselves, that’s also nice.
– Please do send us a thank you card that we can use for our taxes.
– If there’s a way for little kids to help make a thank you card, please do that. There is nothing I like more than getting a ridiculously over-sized paper with tiny handprints on it and a drawing of a flying pig.

Thank You, Mr. SHEH-ska!


Elizabeth Bluemle - May 10, 2012

Jon Scieszka. Photo © 2012, Richard Sassaman


Back when I was a school librarian in Manhattan in the early 90s, this new children’s book author came onto the scene in a big way. He was irreverent, very very funny, liked to fracture fairy tales and nursery stories, and had teamed up with a gifted, wholly unique artist to produce some fairly extraordinary works. You may have heard of him, a clever kid by the name of Jon Scieszka (usual spelling, as my dad would quip). Back then, I never would have expected to find myself, 20 years later, serving him a piece of book-birthday cake with toxic orange frosting.
Jon Scieszka—you should see how fast I just typed that; I learned how to spell his name without looking in 1991 and am quite proud of it—is one of those authors I’ve long admired, but never met. He was coming to Vermont to speak to a bazillion librarians at our state’s Dorothy Canfield Fisher conference, and so we had a golden opportunity to host him the next day at our bookstore.

Spaceheadz 3 CAKE!


I was a little nervous. Here’s a glimpse into the anxieties of a bookseller: it is always a bit nervewracking to meet children’s literature celebrities, because one never knows just how … um… operative … the ego level might be. Before I get in trouble for saying that, let me affirm that the book world, especially the children’s book world, is full of more wonderful people per capita than any other field I know. Every once in a while, though, you come across someone who is just dreadful with children, or is mean to your staff, or is imperious and demanding — or worse, disinterested in his or her own event. So imagine my devastation to discover that Jon Scieszka (typing speed: 1.2 seconds) was —pause for faux suspense — absolutely none of those things!

A sweet moment between Jon Scieszka and fan. Photo © 2012, Richard Sassaman.


He was fantastic with both kids and adults, relaxed yet extremely entertaining, and the lucky audience members who attended were over-the-moon enamored. Sign of a great event? People leaning as far forward in their seats as possible without tipping over. They loved hearing how his life as a teacher had influenced the subject matter of his books. They loved hearing about the origins of his stories, his early adventures with Lane Smith, and his many childhood misadventures immortalized in Knucklehead: Growing Up Scieszka (the phrase “crossed swords” was introduced to a whole new generation). They loved learning about his Guys Reads books, and hearing him read hilarious passages from his newest Spaceheadz book. They giggled madly to learn that his SPHDZ name, as generated by the Spaceheadz website, is “Lemon-Fresh Meat Stick.” Never have we heard peals of laughter as loudly and consistently, from all ages, throughout an event. And that is saying something; we have had some pretty funny guests at The Flying Pig.
Jon Scieszka (typing speed 1.4 sec) handled all questions with aplomb. To the oft-heard “Which one of your books is your favorite?” he said—after assuring readers that he loved all of his books “equally, the way your parents say they love you and your siblings”—he decided that he most loved The Stinky Cheese Man, “because I get to say ‘stinky.’ ” To a little kid who asked why he was so funny, he replied that he loved funny books as a kid. To another kid who announced, “A very important question: What is wrong with your brain?” he just laughed, understanding a genuine compliment when he heard one.
So, THANK you, Mr. SHEH-ska. It was a reel plehzhur.
Sincerely,
Classic Waffle-Mix SPHDZ 3143108
P.S. I didn’t show him this, in case he was, you know, sensitive, but when you run a search for Scieszka in a database, this might be your result:

P.S. This just in from the Children’s Book Council: Jon Scieszka and Jarrett Krosoczka face off in a battle of the ZKA-named authors! This is a very amusing video celebrating the 2012 Children’s Choice Book Awards, with cameos from some folks you may recognize:

P.P.S. Bless Roger Sutton and the Horn Book for archiving one of my all-time favorite articles, a hilarious children’s book author/illustrator name pronunciation guide written in 1996 by the Archduke of Crazy Names, Jon Scieszka (2.4 seconds; it’s late and I’m tired) himself.
 

One of the Kings of Childhood


Elizabeth Bluemle - May 8, 2012

So much will be written about the amazing gift to children’s literature that was Maurice Sendak, and by people who knew him. I can only add a few fragments about his contributions to my own life.
Where the Wild Things Are was my favorite book at age six. I read it hundreds and hundreds of times. I inhabited that world, its jungles and its prickly hero, its rounded, mirthful monsters and solid sinking sailboat, in the way only a child can truly enter fully into a picture book. The book haunted me, in the best way—and, after all those readings, that supper—that grace note of an ending—was still hot. I think that, for me, and for so many of us, this is the book that encapsulates everything universal, compelling, unavoidable, and promising about being a child. (It also brilliantly exemplifies those elements Jerry Griswold talks about as essential to classic children’s literature in Feeling like a Kid: Childhood and Children’s Literature: snugness, scariness, smallness, lightness, and aliveness. Yes, oh, yes.)
I was almost equally fascinated by Hector Protector, especially by the crow with the pebble or crumb in its beak, and the short stubby sword Hector brandished. It’s a funny thing, what catches the attention of a reading child. Why was it the bird, with its alert, alarming eye, and that crumb! such a focus of my interest? I’ll never know, but I’ll bet Maurice Sendak would have had at least a subterranean understanding of it.
Fast forward to my adult life. A wonderful 1970 interview with Sendak by Virginia Haviland, “Questions to an Artist Who Is Also an Author,” gave me a piece of truth that forever informed my teaching, writing, and recommending books to young people. I must paraphrase here, because I don’t have at hand my copy of The Openhearted Audience: Ten Authors Talk about Writing for Children, a tremendously rich and delightful book edited by Haviland. But somewhere in this– or perhaps another–interview, Sendak basically says, when asked why he takes on such dark-ish themes, that “the children know. The children have always known, and they protect us from the knowledge that they know.” That resonated so strongly with me, someone who had been an overly observant little girl who needed to protect her parents from what she understood, and it has been a constant reminder never to stoop to condescension with children, as readers or people.
I’m writing quickly, because the deadline for this post is upon me. So I’ll share just two more tidbits. First — if you have not seen the amazing documentary Last Dance, about Sendak and Yorinks’s collaboration on Brundibar with the Pilobolus dance company, it is a must-watch. One of the most interesting (and often contentious) creative collaborations I’ve ever seen, with some truly extraordinary dancers.
And finally, one of my former writing teachers from Vermont College, Louise Hawes, posted this on Facebook this morning, and it seemed such a fitting send-off that I want to end with it myself. It’s a little snippet from Higglety Pigglety Pop! Or, There Must Be More to Life:
“Hello,
As you probably noticed, I went away forever. I am very experienced now, and very famous. I am even a star. Every day I eat a mop, twice on Saturday. It is made of salami and that is my favorite. I get plenty to drink too, so don’t worry. I can’t tell you how to get to the Castle Yonder because I don’t know where it is. But if you ever come this way, look for me.”

Thank you, Maurice Sendak, for being one of the great, obstreperous geographers of childhood — and a true adventurer.

They Grew Up So Nice


Josie Leavitt - May 7, 2012

Saturday night I had a wonderful time at Domino’s Pizza waiting for too long for my personal-size pizza. I had a comedy gig that ended just past 10 and I was starving and knew there was precious little food at home. So, I stopped by Domino’s for what I thought would be quick take-out.
It was not quick, but I didn’t mind when I saw who I would be waiting with: three 17-year-old customers, all boys, somewhat slumped in their chairs. I knew them all. They have been shopping with their parents since the first year we opened. So, I’ve seen these young men grow from 3-year-olds to 17-year-olds who talked about what colleges they want to apply to, why they skipped the prom (which was that night), and how much fun it was to be able to drive. It’s so interesting to be part of a kid’s life for so long. It always rattles me a little bit when a kid comes in for the first time in a while and they’re swinging car keys and texting their parents to see just how much they can spend at the bookstore.
They were customers, they still are, but as they explained, “We’re juniors now, and don’t have time to just read.” There was something so adorable about these young men alternating between discussing books, colleges and girls and memories of the Flying Pig.  All three, Paul, Raph, and David, had been near constant shoppers until high school started. Then we lost them, almost like dominoes as they progressed through high school.
What surprised and saddened me was that all three guys seemed genuinely sad that their days of pleasure reading had been so shortened by the ever-increasing work load of high school. They all remembered coming to the bookstore for just about every Harry Potter release party. These kids were waxing nostalgic for the bookstore and that made me happy. It reminded me that while I may not see them much anymore, the bookstore is still part of their lives. Paul asked, “When do I get to read what I want to read?” Well, I hedged, knowing full well that college is not really a time when pleasure reading is easy to fit in. I said, “I read a lot on vacation and during the summer.”
All our pizzas were ready at the same time. I kicked into “mom mode” and cautioned them not to eat the pizza during the ride for fear of burning their mouths. As I was pulling out of the parking lot I heard one of them exclaiming through the burnt roof of his mouth, “Damn, that’s hot.” They all laughed and I smiled as I drove away, patting my steaming hot pizza, which remained untouched until I got home.

A Good Galley Day


Josie Leavitt - May 4, 2012

Yesterday I cleaned out a week’s worth of mail from the back seat of my car. The sole purpose of this exercise was to open the more than 15 galley boxes and envelopes. Sometimes this many galleys can yield surprisingly few books that truly excite me.
I don’t mean to sound ungrateful, I love getting galleys, but lately I’ve been getting not one, but two copies of the same metaphysical, business or other kind of book we just don’t really sell. So, it was with great excitement that I discovered two great books in the back of my very messy car.
The first was Son, the sequel to The Giver. The book itself is very compelling with a cover that really works, and pulls you right in. I loved The Giver when it came out and it has continued to remain one of my all-time favorite books. I never thought there’d be a sequel. I always loved the ambiguity of the ending and the guessing as to the fate of Jonas. But, I’m also dying to see what Lois Lowry has done in this book.
The next envelope I opened contained a total surprise. (Maybe I should pay more attention to upcoming releases, but ignorance can make for happy mail days.) Jasper Fforde’s first foray into the young adult realm, The Last Dragonslayer, fell out of the envelope. I hadn’t heard about this, nor did I know it was the first in the Chronicles of Kazam series.
I’m faced now with a very hard decision: which book do I read first? I’m not sure, I’m leaning toward Son, but part of me knows I should probably reread The Giver first, so that’s putting a slight crimp in my plans, as I can’t find my copy of The Giver. Part of my hesitation is reading the follow-up to a much loved book. There is the inevitable worry that it won’t live up to the first book. Right now, I can’t handle that, so, I will start with The Dragonslayer. I’m very  curious to see how Jasper Fforde writes for a younger audience on a theme of an employment agency for magicians. It already sounds good.
I will report back next week to fill folks in on the books.

Make a Bookish Birdhouse of Your Own


amorris - May 3, 2012

A Bookish Birdhouse from The Quiet Book.


Back before moving to New York and packing away my birdhouse-making supplies, I promised to share with you my instructions for making what I call “
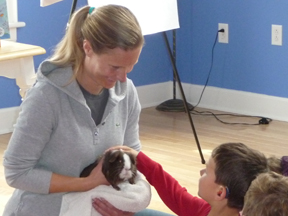
Bookish Birdhouses.” It’s taken a long time, but I’m finally living up to that promise! Earlier this year I unpacked my supplies and hosted a Bookish Birdhouse workshop in our apartment for three friends and colleagues, who agreed to let me photograph them as they tried their hands at this project for the first time. Included with this post are photos (click to view larger) of their efforts and mine — hopefully enough to tempt you to try this project too! I’ve made about 20 Bookish Birdhouses as gifts in past 3 years, and each one has turned out beautifully. If you can cut and paste paper, this is a craft you can do!
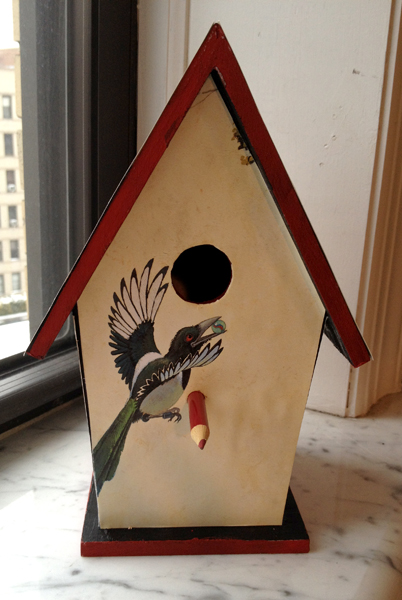
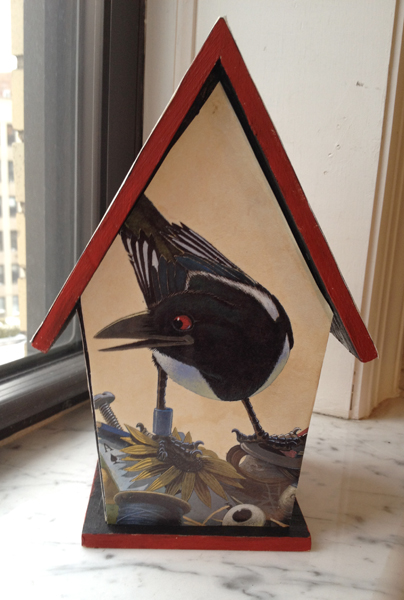
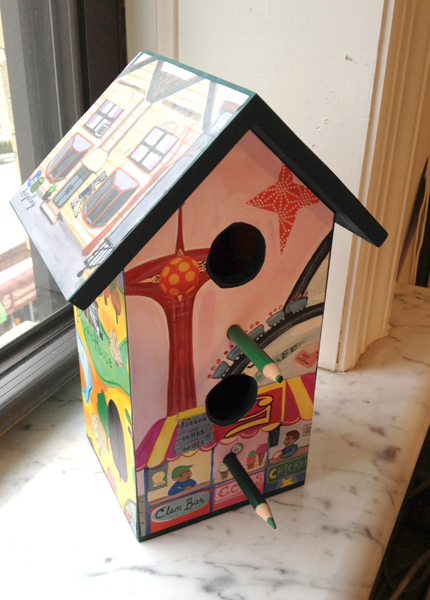
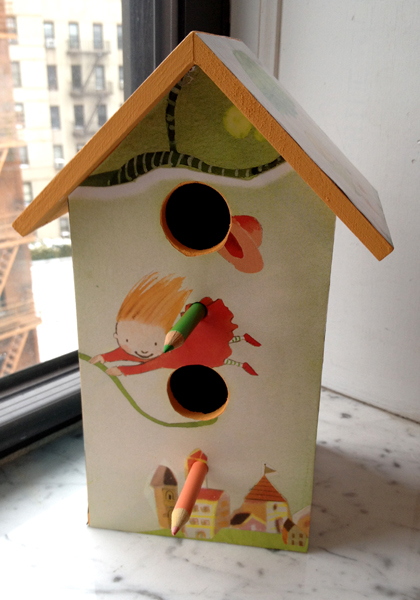
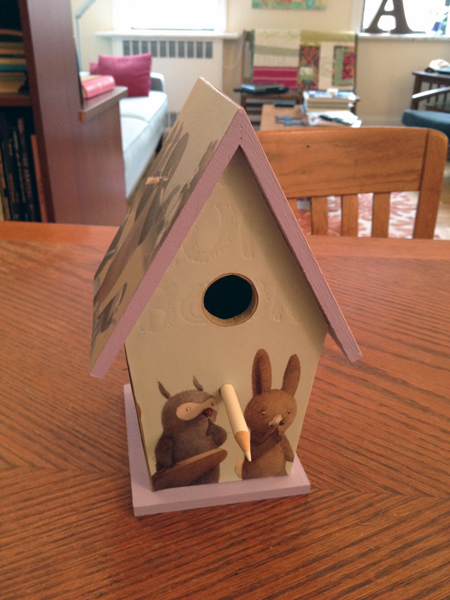
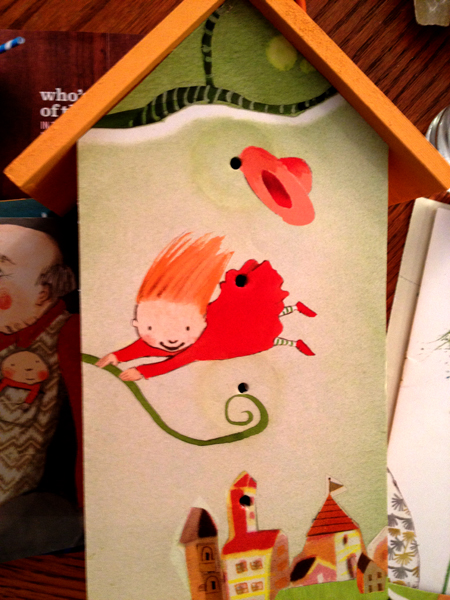
The birdhouse on the right featuring art from The Quiet Book, written by Deborah Underwood and illustrated by Renata Liwska, was a retirement gift for the amazing and wonderful Beth Puffer, lately of Bank Street Bookstore. The other birdhouses and birdhouse-makers featured below are as follows… Betsy Bird (of the New York Public Library and Fuse8) made a birdhouse featuring More written by I. C. Springman and beautifully illustrated by Brian Lies; Heather Scott (my Scholastic Book Clubs colleague and Aunt Feather) made a birdhouse featuring 
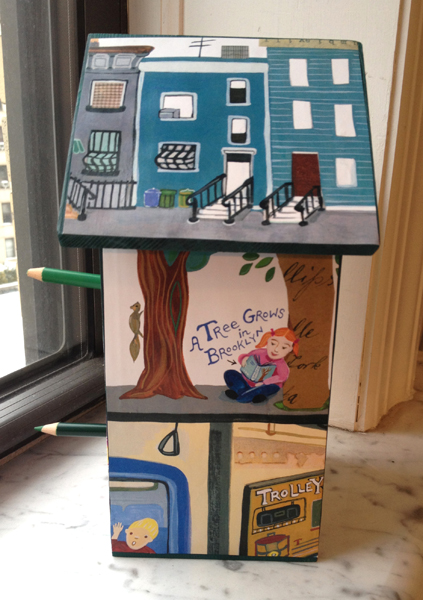
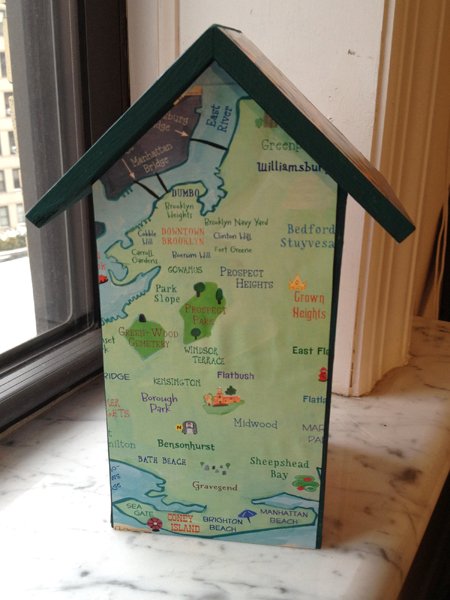
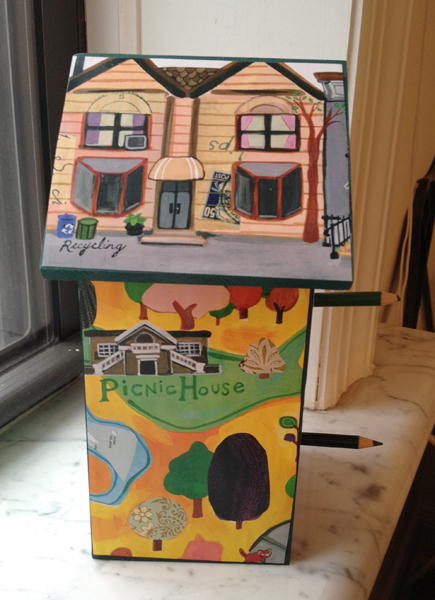
B Is for Brooklyn by Selina Alko; and Lori Ess (who shares an office with me!) made a birdhouse that features Polly Dunbar’s fantastic illustrations for Here’s a Little Poem edited by Jane Yolen and Andrew Fusek Peters. (The Miss Rumphius birdhouse was another of my own projects.)
Three quick things before we dive in:
First, these birdhouses are intended for decorative purposes only. You can try putting one outside for use by actual birds, but I suspect it won’t last long if you do!
Second, unless you are using books that are no longer under copyright, you are arguably in violation of copyright law by making one of these beauties. (See info about “derivative works” for more info.) It’s a gray area of the law, but suffice it to say that you could well into hot water for making these and trying to sell them. GIFTS! They make great GIFTS!
Third, you should NOT be intimidated by the length of these instructions! It’s not hard to make one of these beauties (even a 6th grader can do it), but some steps are trickier than others, and I hope to save you from potential frustration by giving you my insider tips.

BOOKISH BIRDHOUSE SUPPLIES:

* Pre-assembled, unfinished wood birdhouse (see specific suggestions below supply list)
* Sandpaper (fine grain is probably best)
* Cheap acrylic paint (also called “craft paint”) — usually about $1 for each small bottle, available in every color imaginable
* Paintbrushes — various sizes for painting, one good sturdy one for pasting
* Scissors
* Yes Paste (or Mod Podge or PVA if you prefer) — you can purchase it from any craft store
* Colored pencils to use as perches
* A book you don’t mind disassembling, or an F & G (“folded and gathered” picture book proof)

Other things you might need/want:
* Pliers (for removing perches) — see Step 2
* Sealant (if you want to protect your finished birdhouse) — see Step 7 for my recommendations
* a Dowel Rod (if you don’t want to use pencils as perches) — see Step 8
ABOUT BUYING BIRDHOUSES: I buy cheap (about $5) birdhouses from craft supply stores like Michael’s or A.C. Moore. The ones I buy are approx. 9 inches tall and 4 inches deep/wide. (I have not been able to find these sizes and shapes available anywhere online.) I generally like ones that are made from lightweight, cheap “wood” material. Some stores carry two kinds of birdhouses — those made from really lightweight cheap stuff and houses made from sturdier pine. The pine birdhouses are about $2 more expensive, and I personally find them harder to work with. If you have both options, my advice would be to go the cheaper route, at least for your first attempt!
When choosing a birdhouse, don’t worry about discolored wood as you’ll be covering that up. DO, though, look for one that has relatively few dings and seams with few gaps. You’ll cover up most flaws, but it’s easier to work around them when there are few. Try gently wiggling the perch (or perches) in the house — if a perch feels loose, that’s going to make your life easier, as you’ll see in step two below.

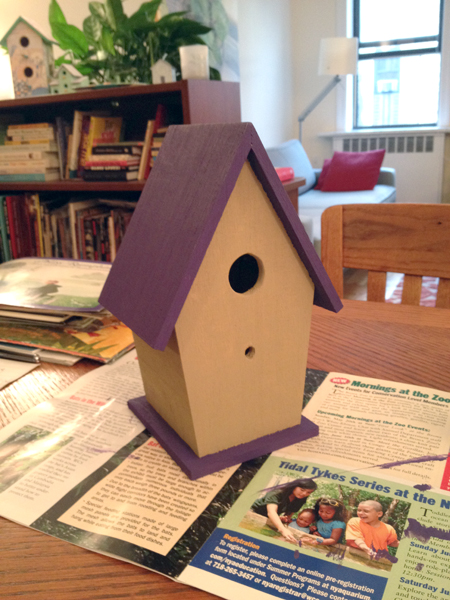
A Single-Story Birdhouse, Newly Painted, with Perch Removed


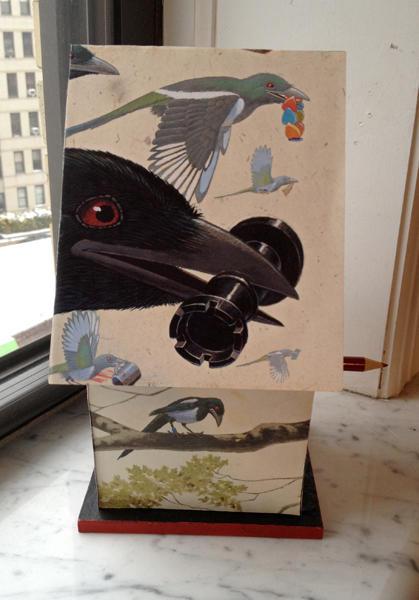
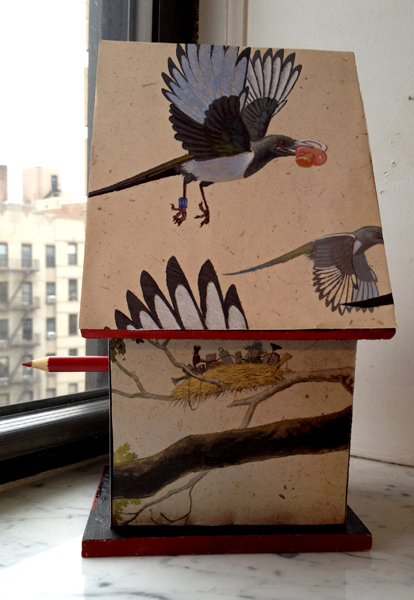
If you’re debating between what I call a “one-story” birdhouse (one perch, one entrance/exit hole) and a “two-story” birdhouse, look at the pages of the book you’ll be working with. If most of your favorite artwork in the book has a vertical composition (meaning much of what you want to show is tall or long rather than short or wide), then a two-story house is probably going to work best for you. If the art on the page tends to be more horizontal, you’ll probably want to go the single-story route. If you’re not really sure what will work best, bring your book with you to the craft store and hold up your favorite pages to the sides and/or roof of each kind of birdhouse to see what things you’ll be cutting off in order to make a page fit — that’ll help decide things for you.
One more thing: on one occasion I bought a couple of birdhouses that had larger than normal perches, which is to say larger-than-the-circumference-of-a-pencil perches. What I thought would be a fun opportunity to try something creative turned out to be a royal pain. If you buy one of these birdhouses you’ll either have to keep that original perch intact when you remove it so that you can use it again OR you’ll have to find a dowel/other object that will work in its place. You *can* wrap wax paper around a pencil until it “becomes” the right width or just use a lot of hot glue to get it to stay in place, but my advice? You’re better off just avoiding birdhouses with big perches.
BOOKISH BIRDHOUSE INSTRUCTIONS:
Step 1: SANDING
Sand down any really rough patches on your birdhouse. You’ll often find these along the top ridge of the roof and inside the holes through which birds would (if they were actually using it) enter the house. If there are gaps along the birdhouse’s seams you can fill them with wood putty, but I generally just leave them alone. Most will either be covered with paper or they’ll become virtually unnoticeable once you’ve painted and decoupaged the whole thing.
Step 2: Let’s call it… DEPERCHING
Remove the perch (or perches) from the front of the birdhouse. I usually try, first, to do this by just wiggling the perch from side to side to loosen the glue holding it in place. If you do this long enough it will usually get to a point where you can then just pull it out. This is especially handy if you’d rather not use a pencil for a perch, as you can paint that intact perch and re-insert it later. If you’ve got a stubborn perch, though, you’ll have to use a pair of pliers to wrench the thing out of the birdhouse. In the process it may very well be crushed, but that’s okay. Just dig out the remaining perch using whatever tools seem to work best for you. (Linoleum cutting tools work well, but I’ve also been known to just poke at the stubborn bits with needle nose pliers until they came loose and fell into the birdhouse, after which I’ve shaken them out over a trash can.) If the front surface of your birdhouse looks a little worse for wear after your perch extractions, just sand it down a bit.

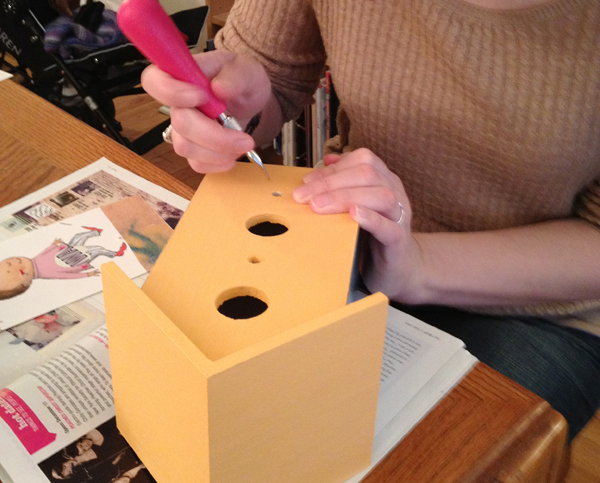
Lori gouges out perch remnants with a linoleum cutter.


Step 3: PAINTING

Paint your birdhouse. I typically use 2 colors on mine — a neutral color for the “body” of the birdhouse, a brighter color for the roof and (if it has one) base — and I usually apply two coats of paint. (If you’re using inexpensive craft paints, you’ll find they dry very fast, so this part isn’t very time-consuming.) I try to choose colors that will coordinate nicely with whatever book I plan on working with. If you cut the pieces for your birdhouse carefully you will see almost none of the paint on the birdhouse except for that along the roof edges and around the entrance/exit hole(s), so you could technically just paint those spots. My preference, though, is to paint the whole thing. That way people will see a nice bit of complementary color anywhere that your cutting has gone awry, and it’ll have a more polished look.

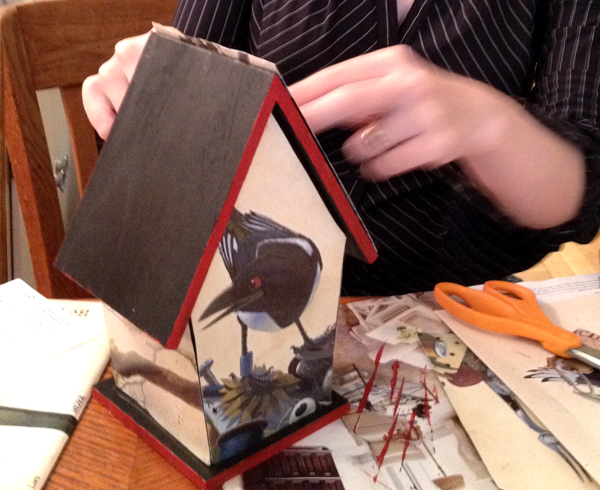
Betsy glues pages from More to her black and red birdhouse.

Step 4: COMPOSING

 This is probably the most important part of the whole process. Take apart the book (or F&G) you’ll be working with and hold up the pages you most want to feature on the birdhouse, to see which will look best on which sides of the house. Think about the overall look you want the birdhouse to have, or the images that you find the most interesting. Pay special attention to the FRONT of the birdhouse, as it poses a unique challenge. Whatever page you position here will have one or (if you chose a two-story house) two large holes cut through the front of it and two perches protruding through it as well. When you lay a page over the front of the house, note where those holes and perches are going to be, and make sure they don’t wind up, say, cutting a character’s head off or in the case of the perches, um… making your birdhouse look obscene. Ahem.

Heather settled on this image from B Is for Brooklyn for the front of her birdhouse.

Step 5: FOLDING AND CUTTING
On each flat side of the birdhouse (body and roof), center the page you’d like to use over the place where you want it, then fold the corners of that page around the edges of that surface. Crease those folds well. Then take your scissors and cut along those fold lines. You *should* now have a piece that’s an almost perfect fit for the space where you wanted it. I often find, though, that I have to go back and do a teeny bit of trimming to make sure things will cleanly abut the edges of that space without leaving any overhang. If you wind up trimming too much, DO NOT WORRY! You can always cut the piece on the opposite side in the same way so that it looks intentional, or (better still) just decide not to worry about. When the birdhouse is done, the art is what’s going to stand out — not your cutting! Trust me when I say that no one will notice if you didn’t cut things in a straight line. I rarely do!

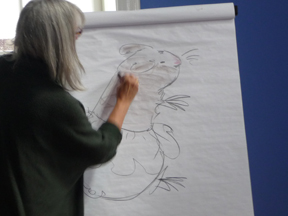
Heather folds page over the top of the roof to make a crease/cutting line. Betsy figures how how to arrange page on rooftop then folds and creases it over the top and the side to create a cutting line.


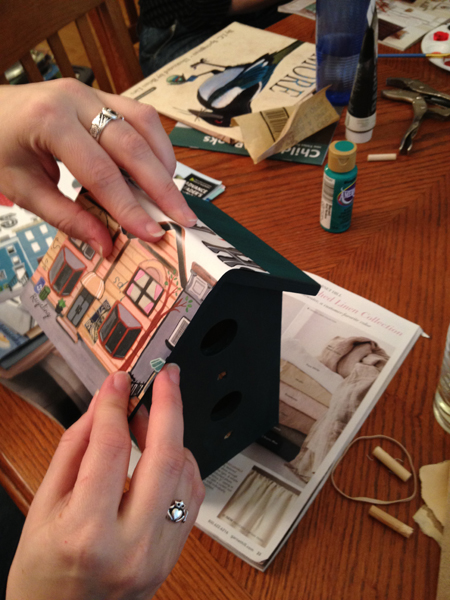
The challenge of this step is (you guessed it) cutting the piece that goes on the front of your birdhouse. To do that section, I always lay the piece of paper over the birdhouse so that the art is laying over the spot where I eventually want it to be. Then I take the top right-hand corner of that page and fold it in so that it follows the right-hand angle on the top of the roof. Once you’ve folded that corner, make sure that newly folded angle is flush against that part of the roof and then fold in the top left-hand corner of your page in the same way. You should now have a piece of paper that looks like a fat arrow, with point at the top and a wide bottom. Now fold the sides of that piece of paper around the sides of the birdhouse, and do the same with the bottom. As above, crease everything well, remove it from the birdhouse, unfold your paper, and use the creases in the paper as your cutting guidelines. Trim things to fit as need be. (See notes about perfection not mattering here!)

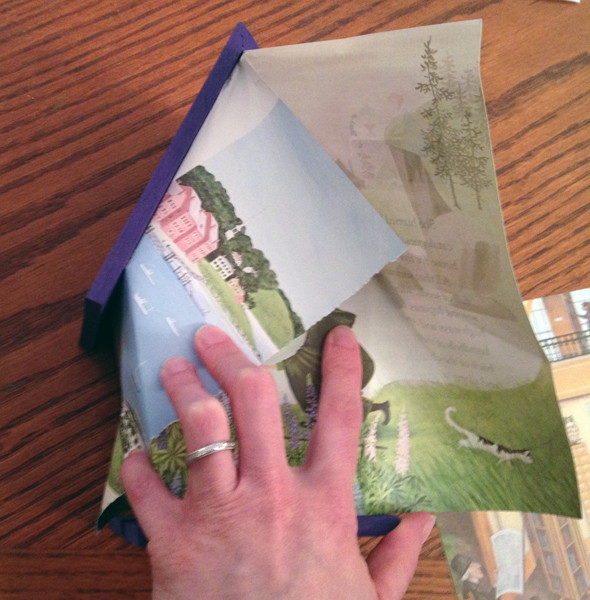
Folding rectangular page to fit under triangular roof.

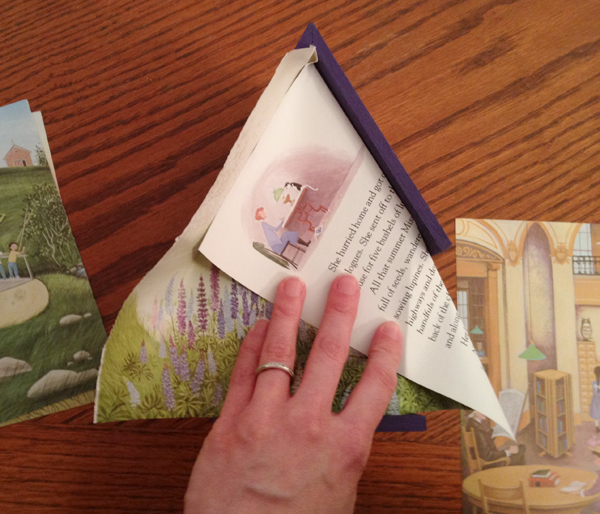
Folding and creasing art for front of birdhouse.


Step 6: HOLING
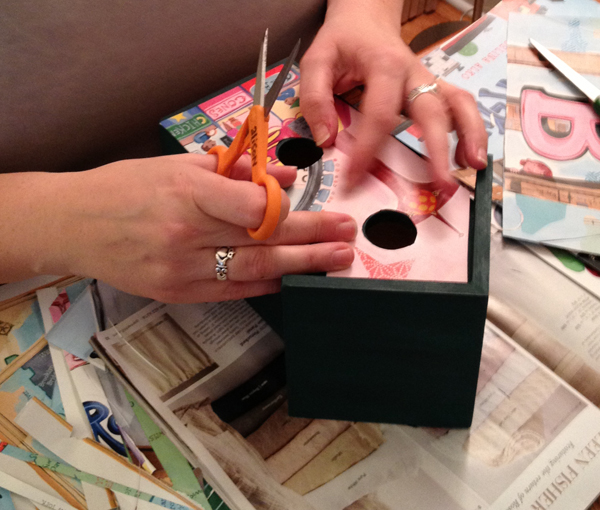
There’s one more tricky bit to be done before you start pasting down your pieces, and that’s putting holes through the paper that’ll go on the front of your birdhouse. Getting these circles to look perfect is a bit of a challenge by almost any method, but AGAIN defer to my “trim things a bit here and there, don’t worry about being exact” instructions. If you wind up cutting your circles TOO big, it won’t matter — it’ll look intentional. Worry more about getting your circles to look round than about how much of your paint job is showing through. Again I say, NO ONE will notice!
After you’ve got a piece cut for the front of your birdhouse, lay it back on the birdhouse again. Now take your finger and run it over the paper, tracing a path around and around the entrance/exit hole in the birdhouse. Do it hard enough to make the paper pucker a bit over the edge of that hole — the idea is that you want to make a faint crease around the entire hole so that (again) you’ll know where to cut. If you look at the photo below (enlarge it!) you’ll see some discoloration where Lori ran her finger around the entrance and exit. Next, hold that piece of paper in place over the holes, take a pencil, and drive it through the page at the center of the entrance/exit hole. (Don’t be scared!) Now run your fingers over the paper, feeling for the perch hole(s). When you’re sure you’ve located it/them, drive your pencil through the paper, so that it tears through and forces a few scraggly edges of paper into the hole meant for your perch.

There are four holes in this piece of paper (which is just laying atop the birdhouse - not glued down!) The first and third holes were punched through the entrance and exit. The second and fourth holes will be for the pencil perches.


When you flip the paper over, you should have jagged, torn edges around your perch hole. Just trim those off and you’re done with that bit. If you angle your paper a bit in good light, you should be able to see a line where the edge of your entrance/exit hole would be, and there should be (thanks to your pencil) a hole in the middle of that space through which you can stick your scissors to begin the actual cutting. I usually cut several straight lines that radiate away from the center of my punched hole out to the edge of my circle. When I’m done with that, I cut on the crease line that’s visible between those radial slices. That way I’m only cutting one short curve at a time, which I find easier than holding my hand in an awkward position and attempting to cut a perfect circle in just one go.
STEP 7: PASTING
After you’ve got all your pieces cut, you are ready to begin pasting them onto your painted birdhouse. (Just make sure the paint is dry first!) I personally like to cut out ALL of my pieces before I start gluing them to my birdhouse. That way I can lay them on top or lightly tape them to the sides and see if I’m happy with my overall composition before I actually attach them to the birdhouse.

Pieces cut and ready to be added to Beth Puffer's birdhouse.


My favorite adhesive to use for this project is Yes Paste because it spreads well once you’ve used it for a bit, it’s not runny so it doesn’t oversaturate your paper, it remains repositionable for a few vital seconds after you first put your paper in place, and it lays nice and flat on the birdhouse with a lot less puckering than I’ve had when I used other glues. Alas I’ve found no guaranteed cure for puckering, but with Yes Paste I’ve had considerably less than I have with any other glue or paste that I’ve tried.
Lay the piece you’re working with face-down on a piece of scrap paper (I like to use discarded magazines or catalogs for this — when one spread gets gluey I just turn a few pages and voila! a new surface to work with). With a sturdy paintbrush, spread paste on your paper working from the center out, making sure to cover the entire surface of the page. You don’t have to use a lot of paste — the idea is not to glop it on, or you’ll have to wipe all your edges afterward. Just put a thin, clean layer on the entire piece, and try to work moderately fast so that the paste doesn’t dry too much in the process.
After you’ve got the back of your piece fully covered, lay it on the side of your birdhouse where you’d like it to be. If you’re off the first time and you act fast, you can peel it off and then lay it on again, or just push it with your fingers so that it’ll slide into the right position. Once it’s where you want it, smooth it all down so that there aren’t any bubbles anywhere. Wipe any extra paste off the edges. If your paper winds up hanging over an edge, use your scissors or an Exacto knife to trim it so that it’s flush.
Do the same thing with the other sides of your birdhouse until all the sides are covered.
STEP 8: SEALING
At this point, you are almost done with your birdhouse! HOORAY! Stand back and admire your work. If you want to add a protective finish to your birdhouse, to protect it against dust, moisture, or fading, this is when/where you’d want to do that. I personally have put a finish on just some of mine, but not all of them, because 1.) I have not yet found a finish that I love, and 2.) the picture book pages I’ve been working with have usually been coated in such a way that they’re a bit more resilient than, say, your basic uncoated office paper or something that’s been dyed. If you are going to use your birdhouse in a very sunny spot, though, I would find some way to protect it. And keep them away from moisture!! No matter how flat they are when you glue them down, those pages you’re working with can buckle later, and there’s no way (that I know of) to remove the air bubbles underneath them once they do.
If you’re fine with leaving your birdhouse as is, skip to Step 9. If not, read on!
Here are my thoughts regarding the various sealants that I’ve tried on birdhouses or other such projects: Mod Podge is a popular choice for sealing projects like this, but I don’t like that it can sometimes become tacky (especially if you live in a humid climate), and that it sometimes shows brush strokes, so it’s not my weapon of choice. Acrylic Medium is another option, but the same possible pitfalls apply, in my experience. Of those I’ve tried, I think Aleene’s Acrylic Spray Finish worked the best, but it’s REALLY important not to over-spray your piece (don’t get too close, and keep your spray can moving) or you’ll wind up with spots where the finish has drips or looks cloudy. I recently used Krylon’s Preserve It! spray on a couple of birdhouses, but I can’t tell you whether or not it did much. One of these days I’m going to try a spray-on polyurethane, but I haven’t been brave enough to try it yet. If you’re braver than I am, just make sure that you buy stuff that’s “non-yellowing”! In all cases you have the option of choosing a finish that’s matte or glossy (and in some cases satin). I am personally a matte or satin finish fan, but glossy is just fine too!
STEP 9: PERCHING
Your last and final step is to add perches to your birdhouse. If you like the look of pencils as perches (that’s what I’ve used on all of mine), then pick out two colored pencils (or regular No. 2 lead pencils in the classic school bus yellow!) and stick them in your perch hole(s) so that the pencils hit the back wall inside the birdhouse. See how far they stick out? If you’re using a brand new pencil, they probably stick out so far as to look silly. Estimate how much you’ll want to remove from the pencil, pull it out of the birdhouse, and then pick up your scissors. Put the pencil between the blades of your scissors so that the blades hit right at the point where you want your pencil to break. Now squeeze your scissors together to put a tiny dent in your pencil. Turn the pencil a bit and do it again. Turn and cut. Turn and cut. Do this until you’ve got deep grooves the whole way around the spot where you want the pencil to break. Now put your scissors down and break the pencil. It should come apart right at the spot where you scored it! Stick it back into our birdhouse so that it hits the back wall. It should stay in place quite well this way, but if for some reason it doesn’t, put some glue around the inside of the perch hole and then slide your pencil into place. Once the glue sets the pencil should stay where you want it.
If you don’t like the pencil look and you were able to preserve your original perch, paint that and put it back in its place. If you want a traditional perch but your original one bit the dust, find a dowel rod that’s the right circumference, cut a section that’s the proper length, paint it, put it in place, and you’re good to go!
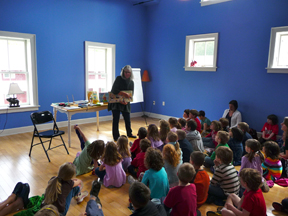
Step 10: CELEBRATING
You’re finished! You did it! Doesn’t your birdhouse look wonderful? Don’t you love it to pieces? Great. Now go make another one! (I promise it’s easier the second time.) Let me know how it goes after you try your hand at one! And feel free to post questions in the comments – I’ll answer as best I can!
Here’s how the birdhouses by the first-timers turned out. (BEAUTIFUL!!)


You Know You’re Going to Want One….


Elizabeth Bluemle - May 2, 2012

I am not a purse girl, particularly. I like a practical (okay, and nice-looking) tote that fits at least one book, if not more. However, I am willing to make an exception, especially when the purse IS A BOOK itself. Woot! The other night, I was chatting with a friend who isn’t in the book world, but is an avid reader. She sent me a text: “Just got this!” with a link to an Etsy.com photo: it was Nathaniel Hawthorne’s The Scarlet Letter, in purse form. I may have started salivating just a little. And then I started checking out the vendor’s other book purses: Pride & Prejudice, Little Women, Crime and Punishment (don’t take that one through airport security), The Secret Garden, Alice in Wonderland, Grimm’s Fairy Tales, a pretty spectacular Wicked with dangling beads…. She’s got Harry Potter and The Hunger Games, too. Let’s just say I was in bibliophile heaven, and that I fell in love with a certain To Kill a Mockingbird handbag with a wooden handle.
I was curious about how these purses are made. The vendor, NovelCreations, has this blurb onsite:

UPCYCYLED BOOK PURSES !

My search starts with ♻ gently used ♻ books. They have to be unique, eye catching, or “make a statement” type books with their covers. My treasures come from garage sales, flea markets, estate sales, and the used bookstore where I work. In some cases, I will purchase a new book if there is a special request that I just can not locate used. Searching for that perfect book is half the fun. The rest is matching the fabric, handles and the button enclosure.

The inside pages of the book are ♻ recycled/upcycled ♻ into other projects that I am working on currently. If you want the inside pages from your purchase, just let me know and I will ship with your purchase at no extra charge.

So, pretty, literary, and ‘green’! What’s not to love?!
I felt it was only fair to send the vendor a note saying I would be blogging about her creations for PW. Frankly, I think she might get ready for a possible uptick in sales.