
 What do stem cell research and your holiday decorations have in common? Both could be improved with the help of a "retro" craft supply called Shrinky Dinks. I’ll leave it to Wired Science to explain the medical advances made possible by this magical plastic toy while I explain here how you can make great little ornaments or wreath decorations (or pins or necklaces or earrings or… almost anything) sporting your favorite images from books.
A few years ago when I was living alone in New Hampshire and the holidays were on the horizon, I bought myself a tiny Christmas tree then lamented the fact that I didn’t yet own any ornaments to hang on it. My solution: trace some of my favorite picture book characters onto magical shrinkable plastic, cut the characters out, punch a hole in the top of each one, stick them in the oven, and watch them curl up and harden into the perfect ornaments for my little reading-themed tree.
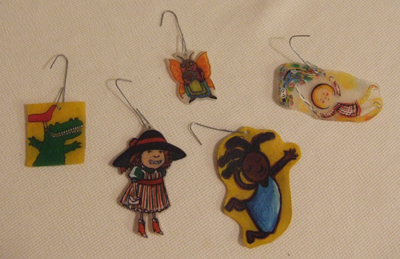
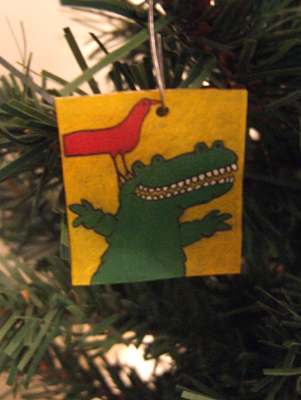
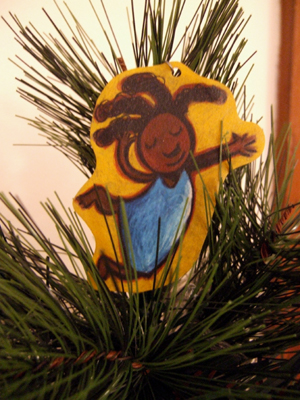
Below are some examples of my Shrinky Dinks handiwork. I punched holes in the first batch so that I could turn them into ornaments. The second batch I left hole-less so that I could glue pin backs to them and make them into picturebook brooches.
Books used for batch one (clockwise, l. to r.): Bill and Pete by Tomie dePaola; The Beautiful Butterfly by Judy Sierra, illustrated by Victoria Chess; Fishing in the Air by Sharon Creech, illustrated by Chris Raschka; The Genie in the Jar by bell hooks, illustrated by Chris Raschka; and Bootsie Barker Bites by Barbara Bottner, illustrated by Peggy Rathmann.
Books used for batch two (clockwise, l. to r.): Going Home by Eve Bunting, illustrated by David Diaz; Charlotte’s Web by E.B. White, illustrated by Garth Williams; Chrysanthemum by Kevin Henkes; and Hush! A Thai Lullaby by Minfong Ho.

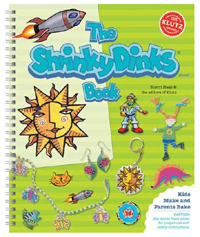 My source for this project’s materials was originally non other than The Shrinky Dinks Book published by Klutz, which includes original designs you can trace plus the plastic onto which you do the tracing. If you plan on tracing images from books already in your home library, all you really need is the plastic + instructions (not the pages of Klutz-created designs). You can satisfy this need with the Klutz Shrinky Dinks "Extra Stuff" package or buy plastic in large quantities from the Shrinky Dinks web store.
If you’ve never had the pleasure of watching Shrinky Dinks perform their magical shrinking trick, you can watch the rather earnest Shrinky Dinks video that shows the stuff in action. (And, no, I am not related to Betty Morris, the inventor of Shrinky Dinks… At least, not that I’m aware.)
You don’t have to be a decent artist to do this project. Seriously! You just have to be able to trace things. If you are an artist though, go ahead and draw your own design. In either case, choose or create an image that will be the right size for your finished project once it’s shrunk down to one-third of its size. In other words, think big. If you’re tracing, note that the best images to use are ones that have a strong line and rather distinct areas of color. Images in which shades blend quite a bit are harder to trace, in general.
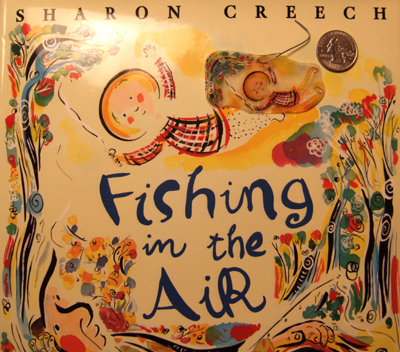
Another tip for choosing images: be aware that any spaces you don’t color will wind up being frosted "see through" spaces, which may not work as well if you’re making, say, a pin that will lay against a dark shirt color, against which it may look odd or the imperfections of your drawing will be more visible. Here’s my Fishing in the Air Shrinky Dink as a light-colored/lots of clear space example.
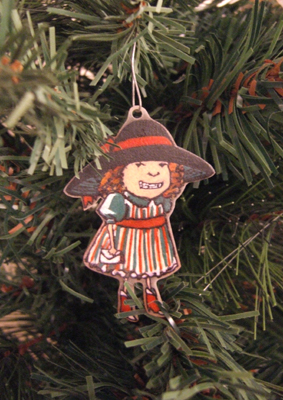
Also be aware that you can make slight variations to your traced images in order to keep them the size you need or make them a little more suited to their final uses. I changed the colors of Bootsie Barker’s dress below to make it look more Christmasy. In the Chrysanthemum Shrinky Dink above, I put a bouquet in her hand because the actual chrysanthemum on the book’s cover was too tall for my pin purposes.
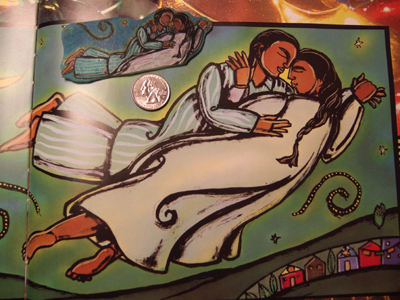
Below are two examples of how my Shrinky Dink compares to the original drawing, with a quarter to give you a sense of scale!
Once you’ve chosen an image to trace, follow these simple steps to make your Shrinky Dink!
 1. Take a sheet of clear Shrinky Dinks plastic and lay it rough side up on the image that you want to trace. Use tiny bits of tape to lightly adhere the sheet of plastic to the page so that you don’t accidentally move it around while you’re tracing.
2. Trace the image onto the plastic. You can use any number of different art materials to do this, but my personal favorite is colored pencils, which is what I used to create all the examples you see here.
3. Cut out your image or cut around your image in the shape you’d like the finished piece to be. If you’re going to be putting your Shrinky Dink on an ornament hook or threading anything through it, use a traditional hole punch to punch a hole in the ornament. (The hole will of course shrink down to about 1/3 its original size too, making it nice and small relative to your overall design, unless your design is tiny.)
 4. See the baking how-to on the PDF of instructions from the Shrinky Dinks site. (The gist: lay your shape on tin foil or brown paper atop a cookie sheet, bake at 325 degrees for 1 to 3 minutes. But, really, read their instructions sheet for key details and helpful suggestions.) Note that watching your plastic curl is one of the most entertaining parts of this process, so you ideally want to bake your Shrinky Dinks in an oven or toaster oven with a window. Do this craft with kids and they will be AMAZED!
5. L
et
your Shrinky Dinks cool, then turn them into ornaments or jewelry. Voilà!
One very important note about these entertaining little craft projects. If you create ornaments or jewelry or ANY objects like this by tracing the illustrations from copyright-protected books, you CANNOT sell those objects. If you do you’ll be violating copyright law. Make them for yourself and you’re fine. Start your own Etsy store featuring such ornaments and jewelry and you’re NOT.
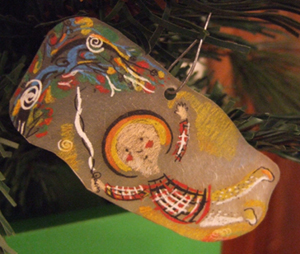
If you give this project a try, let me know how it goes! (Send a message to Shelftalker AT Gmail DOT com.) I hope the results make you feel as happy and satisfied as the "angel" on my own little tree:
So cute! You could make keyrings, too. What’s the deal with selling things with images taken from books, though? What if you scavenge pages from the book and cut and paste them to make ornaments? Can you sell those?
I was so excited to see your blog about Shrinky Dinks – I made some myself about 25ish years ago, and didn’t know they were still available! My son will love making these….
This is truly uncanny, as I just bought a package of Shrinky Dinks paper for my art-loving 6 yo son THIS VERY MORNING. Thank you for this wonderful post! He will be so excited when I tell him we can make Frog and Toad shrinkies, for instance.
I’m inspired. I’ve never tried Shrinky Dinks, but it’s about time. Thank you for sharing such a wonderful activity that incorporates children’s stories.
Alison when I saw stem cell and shrinky Dinks I started reading immediately! Martha and I are very proud of you:-) Merry Christmas, xo Karl
I don’t usually reply to posts but I will in this case, great info…I will add a backlink and bookmark your site. Keep up the good work!
Pingback: Shrinky Dinks: The PAAS of Christmas « A Fuse #8 Production